Kiss Cut vs. Die Cut Stickers: Differences & Which to Choose
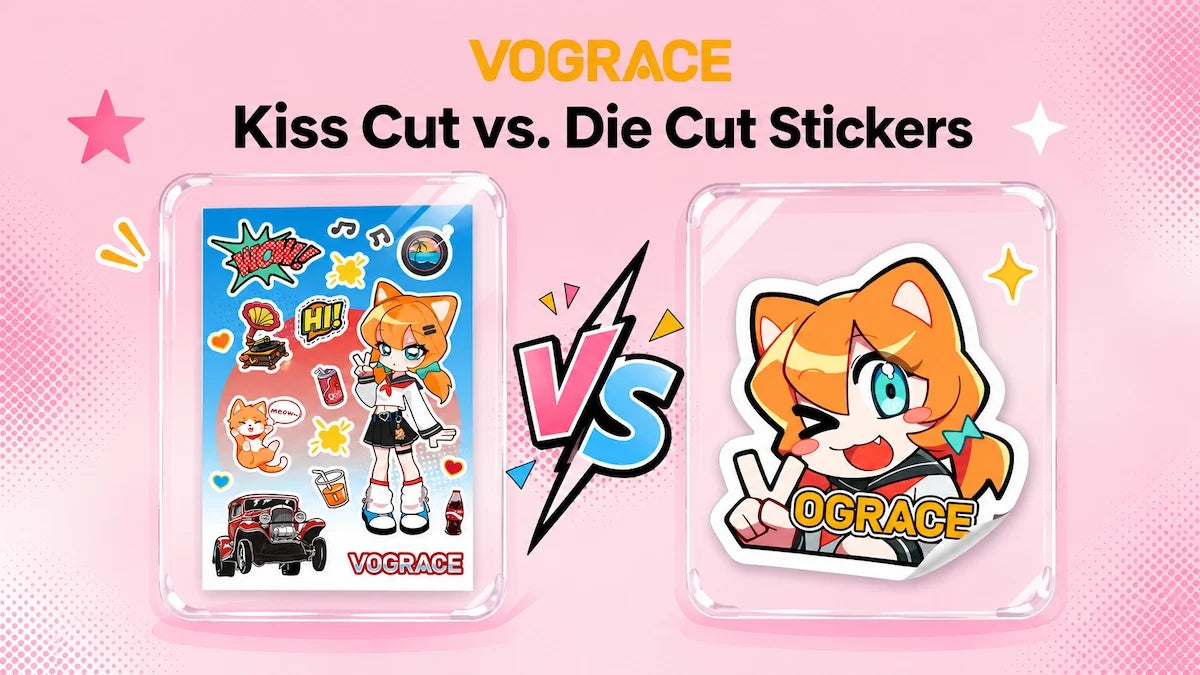
Whether you're ordering stickers or trying to make your own at home, you have two options: kiss cut and die cut. Both are quite popular and offer custom shapes. Deciding between them can feel confusing, but in reality, it isn't.
Every sticker comes with a backing paper that protects the adhesive. Whether this backing paper is cut or not is what separates kiss-cut and die-cut stickers. This small detail can change a lot of things, like how the stickers are mailed, how you handle them, and who they suit best.
In this guide, you'll learn everything you need to know about kiss cut vs. die cut stickers and which one you should choose.
Kiss Cut vs. Die Cut Stickers: Key Differences and How to Choose
To understand the difference properly, start by thinking of a sticker as two layers.
The top layer is where your artwork is displayed, and it is what you stick.
The bottom layer is the backing paper that protects the adhesive. This layer is what you peel away before sticking.
Now, with a kiss cut, the blade cuts only the sticker material (the top layer) and stops there. The backing paper (the bottom layer) is completely untouched by the blade. The backing stays whole, so the top sticker layer sits on a full sticker sheet or a piece of paper.
With a die cut, the blade cuts through both layers, the sticker material and the backing paper. Hence, the backing paper is trimmed to match the shape of the sticker, and you end up with a loose sticker instead of an entire sheet.
No matter the design, you can get either a kiss cut or a die cut, because neither one limits the shapes. Identifying them is easy too. A kiss-cut sticker is either on a sticker sheet or has a wide border of paper around it. A die-cut sticker, on the other hand, is one loose sticker that maintains the shape of the design.
Kiss Cut vs. Die Cut Stickers Comparison Table
Here's a quick overview of the key differences between kiss-cut and die-cut stickers. Use this table as a reference guide to choose the right cut for your needs.
|
Feature |
Kiss Cut Stickers |
Die Cut Stickers |
|
Cuts Through |
Sticker material only |
Sticker material and backing paper |
|
Backing Paper |
Extends beyond the sticker |
Trimmed to match the sticker's outline |
|
Arrives |
Often on a sticker sheet |
As individual pieces |
|
Peeling |
Easier to peel from the sheet |
May require more care with detailed shapes |
|
Multiple Designs |
Multiple designs can fit on one sheet |
Handled as separate pieces |
|
Custom Shapes |
Yes |
Yes |
|
Best For |
Collections and sticker sheets |
Single stickers and giveaways |
How to Choose Between Kiss Cut and Die Cut Stickers
Choose Kiss Cut Stickers If:
● You want to sell sticker sheets or collections, for example, a set of stickers with the same theme.
● You want to place several designs on a single page.
● You prefer to keep the backing intact so the stickers are easier to handle and store.
● You like having extra paper around the design.
Kiss cut is what you want to use to make sticker sheets with multiple designs. You can also use the extra space around the design to add your company details, social media handles, or other information.
Choose Die Cut Stickers If:
● You need single stickers for giveaways.
● You sell standalone logos, characters, or custom artwork.
● You prefer each sticker to have its own backing, matching the shape of the design.
● You dislike having extra paper around the design.
Kiss Cut Stickers Explained: Uses and How to Make Them
 As mentioned, a kiss-cut sticker has its top layer cut into shape, while the backing paper remains in one piece. Think of it like this: your design sits inside a border of paper, like a picture in a frame. When you want to use it, you peel the sticker from the middle and leave the rest of the paper behind.
This frame is also why most people like making these stickers. Stickers with thin outlines or small details lift off without tearing, and the backing paper protects the sticker until you use it.
Because the sheet stays intact, you can fit several designs on one single page. This is why kiss-cut stickers are a great match for planner stickers, collections, and decorative artwork.
Kiss cut is great if you want to sell or ship stickers. You can prepare the entire sheet and slide it into a flat mailer without bending the artwork, and buyers can purchase the whole set at once. You can also include small pieces of artwork like stars and letters and not worry about them getting misplaced.
Here's how you can make kiss-cut stickers at home:
1. Prepare your artwork with a transparent background.
2. Next, add an offset around each design and arrange the stickers on a canvas the same size as your sticker sheet.
3. Print on sticker paper or printable vinyl that works with your printer.
4. Test your cutting depth on a spare piece. The blade should only cut the sticker layer and leave the backing untouched.
5. Cut the full sheet with a cutting machine or with a sharp craft knife.
6. Finally, trim the sheet edges, peel the stickers, and apply.
Die Cut Stickers Explained: Uses and How to Make Them

Unlike a kiss-cut sticker, a die-cut sticker is cut through both layers. This is why the sticker layer and the backing paper have the same outline, and there is no extra paper around the sticker.
Die-cut stickers are extremely popular for DIY, and they are the go-to default for homemade stickers. The reason is simple: making die-cut stickers at home is far easier than making kiss-cut stickers.
These stickers are often used as logo stickers, character artwork, laptop stickers, and promotional giveaways, because each piece is ready to hand over.
A die cut gives your artwork a clean silhouette, because nothing surrounds the sticker other than the usual offset. The shape you designed is the shape people see, and this suits bold mascots and logos.
Storing these stickers is easy too. You simply stack them and keep them in a box, and they are also easy to count when you pack orders. Since every sticker is separate, you can easily swap one design for another without breaking up a set.
Here's how you can make die-cut stickers at home:
1. Prepare your artwork with a transparent background.
2. Arrange the designs on a canvas that matches your sticker paper.
3. Print the sheet and let the ink dry fully.
4. Cut around each design with scissors, a craft knife, or a cutting machine.
5. Make sure to cut both the sticker layer and the backing paper. Since you're cutting both layers, you can use scissors for die-cut stickers but not for kiss-cut.
6. Now simply peel the stickers and apply them.
Choosing the Right Stickers for Your Business
If you're confused about which stickers to choose for your business, you can start by asking yourself these questions.
1. How will you pack the stickers?
2. Who will receive the stickers?
3. Where will people use the stickers?
With these questions answered, and with the help of the table above, you should be able to choose the right stickers. Or you can also mix the two. Sell sticker sheets and drop a loose die-cut sticker in as a token of thanks.
And if you would rather order these stickers than make them yourself, we offer custom kiss-cut stickers as sheets and custom die-cut stickers as single pieces, so you can focus on building your business while we handle the production.
Frequently Asked Questions
Do Kiss Cut and Die Cut Stickers Look the Same?
Once you peel the stickers off their backing and apply them, both kiss-cut and die-cut stickers often look the same. The cut changes how the stickers look before they're applied, while they're still attached to the backing paper.
Are Kiss Cut Stickers Waterproof?
It's not the cut that decides that. To make your stickers waterproof, you must choose a waterproof sticker material like vinyl. To protect the ink and make your design waterproof, you can add a layer of clear lamination on top.
Are Die Cut Stickers Better for Detailed Designs?
Both kiss-cut and die-cut stickers are great for detailed designs, and they both allow for a lot of detail. However, if your artwork has very thin lines and tiny details, the type of cut you choose can make cutting and peeling easier or harder.
What Is a Full-Cut Sticker?
A full-cut sticker is simply another name for a die-cut sticker. Both refer to the exact same thing: a sticker that is cut completely through both the sticker layer and its backing paper.
Can You Kiss Cut and Die Cut Stickers on the Same Sticker Sheet?
Yes, you can combine kiss-cut and die-cut stickers on the same sticker sheet. You can keep kiss-cut stickers on the sheet or cut them into simple shapes, like squares, while leaving the backing intact. For die-cut stickers, cut around each design through both the sticker material and backing paper.